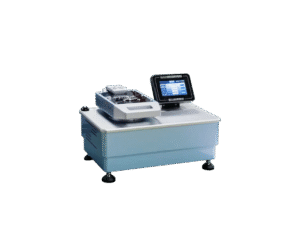
Description
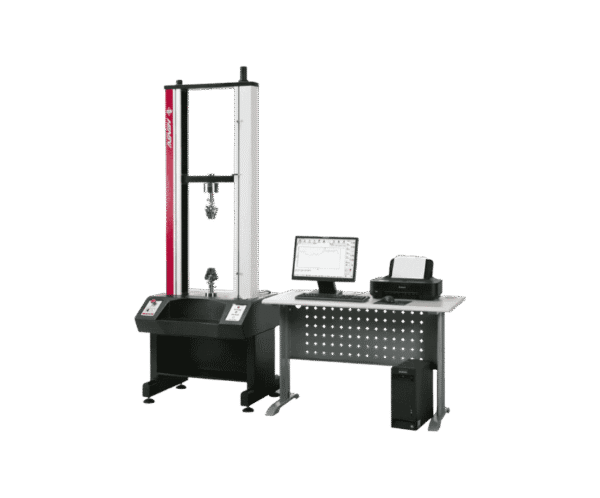
The Tensile testing machine is widely used for material testing across diverse industries, including rubber, plastics, footwear, leather, clothing, textiles, insulators, and terminals. It supports a comprehensive range of tests such as tensile, tear, peel, and bending, making it ideal for both material research and development and routine quality testing.
Software Features
- Software Environment: Operates on the HY-V software package (available in Chinese and English) under the Windows 7 platform.
- Multilingual Support: Seamless switching between Simplified Chinese, Traditional Chinese, English, and other language interfaces, ensuring ease of use for operators worldwide.
- Unit Conversion: Enables free conversion between all common units of force, displacement, and energy.
- Core Functionalities: Automatically calculates and displays key testing parameters and graphics, including:
- Yield point
- 0.2% offset yield
- Yield strength
- Tensile strength
- Elongation
- Energy absorption
- Maximum load
- Rupture values
- Deformation
- Averages
- Over 20 comparative parameters visualized in graphs.
- Multiple Curve Displays: Supports stress-strain, force-displacement, force-time, and strength-time curves, among others.
- Data Management: Utilizes a database to manage test records and standards, allowing users to access pre-built datasets or create custom ones.
- Test Modes: Covers tensile, bending, compression, adhesion, tear, peel, and elongation tests, with customizable settings.
- Control Modes: Includes fixed displacement, fixed speed, constant strain rate, fixed load, fixed load rate, and more.
- Zeroing Function: Convenient manual zeroing for force, elongation, and displacement with a single button; automatic zeroing activates at the start of each test.
- Real-Time Monitoring: Dynamically displays load, elongation, displacement, and selected test curves on the main screen during testing.
- Peak Hold: Continuously displays the maximum value of the ongoing test in a dedicated on-screen window.
- Manual Data Point Capture: Allows operators to manually record critical data points during testing.
- Automatic Recognition: After sample breakage, the system automatically identifies completion and proceeds to the next step as programmed.
- Automatic Storage: Saves test conditions, results, and gauge positions automatically.
- Auto-Return Function: The crosshead automatically resets to the starting position after test completion.
- Graphical Analysis: Post-test, users can analyze curves by selecting any point with a mouse, zoom in for detailed inspection, and print results.
- Curve Comparison: Overlays curves of multiple samples in the same group for easy comparison.
- Report Customization: Test graphics and parameters are fully editable; supports multiple report formats for flexible output.
Technical Specifications
- Load Cell: High-precision 0.5-level force sensor.
- Capacity Options: 2KG, 5KG, 10KG, 20KG, 50KG, 100KG, 200KG, 500KG.
- Accuracy Class: Class 1.
- Test Force Range: 0.4% ~ 100% FS.
- Load Accuracy: ≤ ±1%.
- Load Resolution: 1/200,000.
- Load Magnification: 7-level automatic switching (X1, X2, X5, X10, X20, X50, X100).
- Displacement Error: ±1% of indicated value.
- Displacement Resolution: 0.005mm.
- Deformation Measurement Range: 2% ~ 100% FS.
- Deformation Indication Error: ≤ ±0.5% of indicated value.
- Large Deformation Range: 10 ~ 1000mm.
- Large Deformation Error: ±1% of indicated value.
- Large Deformation Resolution: 0.008mm.
- Control System: Frequency converter.
- Drive System: AC variable-frequency motor.
- Motor Power: 1.5KW.
- Reduction Gear: Italian Outes precision hollow aluminum reducer.
- Crosshead: Forged high-carbon steel with excellent mechanical strength and zero deformation.
- Drive Screw: Taiwanese dual-structure precision ball screw.
- Guide Bars: Two Φ50mm Korean Taijing shafts, surface-treated with high-frequency hardening and hard chrome plating (HRC ≥ 60).
- Bearings: Japanese NSK high-carbon ball bearings.
- Transmission Belt: High-strength Japanese belt.
- Machine Structure: Split design with a main frame and separate control box.
- Test Speed Range: 25 ~ 100mm/min, 50 ~ 200mm/min, 100 ~ 500mm/min.
- Speed Accuracy: ≤ ±1% of indicated value.
- Test Stroke (Excluding Fixtures): 1000mm.
- Effective Column Spacing: 410mm.
- Fixtures: All fixtures feature hard chrome plating (HRC ≥ 55).
- Dust Protection: Taiwanese anti-accumulation dust cover to protect the ball screw, extending its lifespan and maintaining precision.
- Surface Treatment: Dupont powder coating with electrostatic painting, cured at 200°C for permanent colorfastness.
- Display System: In-house developed HY-V software, specialized for material testing machines, under the Windows XP platform.
- Data Transmission: 16-bit data transfer via RS-232; all parameters stored in peripheral hardware, eliminating the need for additional computer components and simplifying upgrades and maintenance.
- Safety Protections:
- Upper and lower limit stroke protection via travel switches.
- Emergency stop button for immediate braking.
- Overcurrent, overvoltage, undercurrent, undervoltage, leakage, and overload protection.
- Software-based overload limit protection.
- Power failure recovery protection.
- Dimensions: 560 × 420 × 1800mm.
- Power Supply: AC 220V, 50Hz.
- Weight: Approximately 260kg.
Package Includes
- Customized pair of fixtures (based on customer specifications).
- Chinese user manual.
- Instrument warranty card.
- GB CNAS-accredited third-party calibration report.
